Month: April 2026

toastmaster belgian waffle baker instructions

Toastmaster Belgian waffle bakers offer a delightful way to create breakfast treats! Models like TWB2BELT, TWB4REG, and TM-285WM are popular.

User manuals from 2012 to 2021, found on ManualsLib, Fixya, and the Internet Archive, provide detailed instructions for optimal use.

Overview of the Toastmaster Belgian Waffle Baker

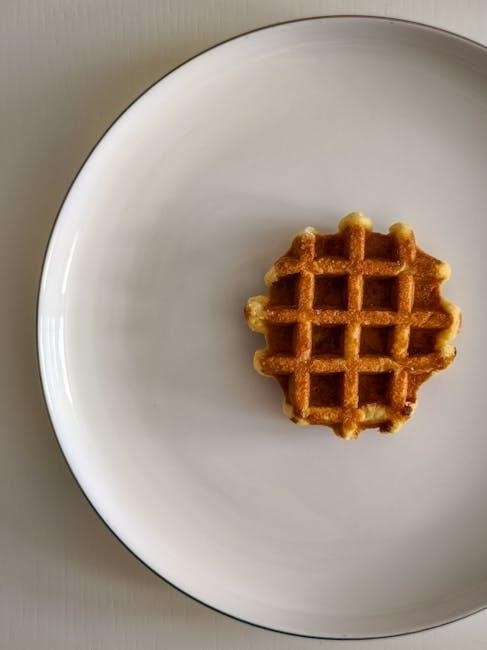
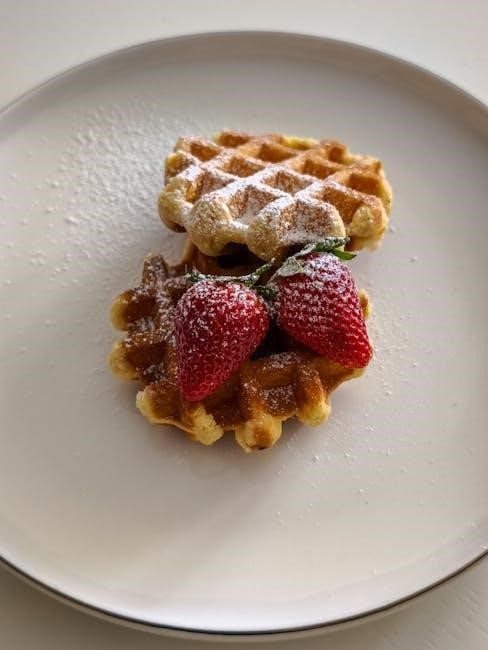
Toastmaster Belgian waffle bakers are designed for convenient and enjoyable home waffle making. These appliances, including models TWB2BELT, TWB4REG, TWB2REGT, TM-285WM, TWB2PIZCAN, and TWB2PIZT, consistently deliver golden-brown, fluffy waffles.

Operating instructions emphasize preheating, careful batter addition, and monitoring cooking time. Safety precautions, detailed in user manuals available since 2012 (ManualsLib, Fixya, Internet Archive), highlight the importance of protecting countertop surfaces with trivets, especially solid surfaces prone to heat damage.

Care involves cleaning after each use and proper storage; Troubleshooting guides address common issues like sticking and uneven cooking;

Models Covered in this Guide (TWB2BELT, TWB4REG, TWB2REGT, TM-285WM, TWB2PIZCAN, TWB2PIZT)

This guide provides instructions applicable to a range of Toastmaster Belgian waffle baker models. Specifically, it covers the TWB2BELT, TWB4REG, TWB2REGT, TM-285WM, TWB2PIZCAN, and TWB2PIZT. While slight variations may exist, the core operating procedures – preheating, batter application, and cooking – remain consistent across these units.

User manuals, accessible through resources like ManualsLib and the Internet Archive (with versions dating back to 2012), offer model-specific details. Care and maintenance guidelines, as well as troubleshooting tips, are generally applicable to all listed models, ensuring optimal performance and longevity.

Before First Use

Cleaning the Toastmaster waffle baker and conditioning the grids are essential first steps. This prepares the appliance for optimal performance and delicious waffles!

Cleaning the Waffle Baker

Thorough cleaning is vital before the initial use of your Toastmaster Belgian waffle baker. Ensure the unit is completely cooled and unplugged. Gently wipe down the exterior with a damp cloth – avoid abrasive cleaners that could cause damage.

The grids require special attention. Use a soft cloth or sponge with warm, soapy water to remove any manufacturing residue. Avoid immersing the waffle baker in water, as this could lead to electrical hazards. Rinse thoroughly and dry completely before proceeding to the conditioning stage. Proper cleaning ensures food safety and optimal performance.

Conditioning the Grids

Conditioning the grids is a crucial step before baking your first Belgian waffle. After cleaning, lightly brush the grids with a neutral-flavored cooking oil, such as vegetable or canola oil. This creates a non-stick surface, preventing waffles from adhering and ensuring easy release.

Plug in the waffle baker and allow it to preheat. Once heated, unplug it and let it cool completely. Wipe away any excess oil with a clean cloth. This process prepares the grids for optimal performance and contributes to perfectly golden, delicious waffles every time.

Operating Instructions

Operating your Toastmaster waffle baker involves preheating, adding batter, and setting the appropriate cooking time. Refer to your model’s manual for specifics!

Preheating the Waffle Baker

Preheating is a crucial step for achieving perfectly cooked Belgian waffles with your Toastmaster appliance. Ensure the waffle baker is plugged into a grounded electrical outlet before beginning. Allow sufficient time for the unit to reach the optimal temperature – typically a few minutes.

The indicator light will signal when preheating is complete, often changing color or turning off. Do not attempt to add batter before the unit is fully preheated, as this can result in sticking and uneven cooking. Proper preheating ensures a crispy exterior and fluffy interior, maximizing your waffle-making experience.

Adding Batter

Once the Toastmaster Belgian waffle baker is preheated, carefully pour the batter onto the lower grid. Avoid overfilling; use just enough batter to cover the grid surface, leaving a small margin around the edges. Overfilling can cause batter to spill over during cooking, creating a mess and potentially damaging the appliance.

Close the lid gently but firmly. Do not force the lid closed, as this could damage the heating elements. The batter should spread evenly across the grid as the lid closes. Refer to your recipe for recommended batter quantity, ensuring optimal waffle thickness and texture.

Cooking Time and Temperature

Toastmaster waffle bakers generally don’t require specific temperature settings; they operate at a pre-set optimal heat. Cooking time varies depending on the model and desired waffle crispness, but typically ranges from 3 to 5 minutes.

Watch for the indicator light to change, signaling the waffle is ready. If your model lacks an indicator, carefully lift the lid to check for golden-brown color and a firm texture. Avoid opening the lid frequently during cooking, as this releases heat and extends cooking time. Experiment to find your perfect waffle!

Using Your Waffle Maker ー Safety Precautions

Always use a trivet to protect countertops from heat damage, as Toastmaster manuals advise. Cool-touch features help prevent burns during operation.

Protecting Countertop Surfaces

Solid surface countertops are vulnerable to damage from the Toastmaster Belgian waffle baker’s heat. Manuals explicitly warn against scratching, cracking, scorching, or other harm to these surfaces. To mitigate these risks, always employ a trivet beneath the waffle maker during operation.

A trivet acts as a protective barrier, distributing heat and preventing direct contact. This simple precaution safeguards your countertops, preserving their appearance and structural integrity. Ignoring this advice could lead to costly repairs or replacements. Prioritize countertop protection for a worry-free waffle-making experience!

Cool-Touch Features

Certain Toastmaster Belgian waffle baker models, such as the TWB2 Cool Touch, are designed with safety in mind. These models incorporate cool-touch housings, minimizing the risk of accidental burns during operation. However, it’s crucial to remember that the grids themselves become extremely hot.

While the exterior remains relatively cool, exercise caution when handling the waffle maker. Avoid touching the hot surfaces directly. Always use oven mitts or heat-resistant utensils when operating or cleaning the appliance. Prioritize safety and protect yourself from potential burns during the waffle-making process!

Care and Maintenance

Regular cleaning after each use is essential for maintaining your Toastmaster waffle baker. Proper storage will also extend its lifespan and performance.

Cleaning After Each Use

After each delightful waffle-making session, unplug your Toastmaster Belgian waffle baker and allow it to cool completely. This is a crucial safety step! Gently wipe the exterior with a damp cloth to remove any batter splatters or residue.

For the grids, avoid abrasive cleaners that could damage the non-stick coating. A soft cloth or sponge with mild dish soap is ideal; Ensure no water enters the unit’s interior. Thoroughly dry all components before storing, preventing potential corrosion or electrical hazards. Consistent cleaning ensures optimal performance!

Storage Instructions

Before storing your Toastmaster Belgian waffle baker, ensure it is completely cool and dry. This prevents damage and potential hazards. Store the appliance in a cool, dry place, away from direct sunlight and moisture.

Avoid wrapping the power cord tightly around the unit, as this can cause damage over time. A loose coil is preferable. If possible, store the waffle maker in its original packaging to protect the non-stick coating. Proper storage extends the lifespan of your appliance, ensuring many more waffle breakfasts!

Troubleshooting

If waffles stick, ensure proper conditioning and sufficient preheating. Uneven cooking may result from uneven batter distribution or insufficient preheating time.

Waffles Sticking to the Grids

Experiencing waffles adhering to the grids is a common concern with Belgian waffle makers. Firstly, ensure the waffle baker has been adequately conditioned before its initial use; this creates a non-stick surface. Secondly, confirm the unit is sufficiently preheated – a cold surface will invariably cause sticking.

Additionally, using a quality waffle batter with appropriate ingredients is crucial. Consider lightly greasing the grids with cooking spray, though avoid excessive application. If sticking persists, gently loosen the waffle with a non-metallic utensil to prevent grid damage. Remember to consult your user manual for specific recommendations.

Unevenly Cooked Waffles

Addressing unevenly cooked waffles requires a systematic approach. Initially, verify the waffle maker is level on your countertop to ensure uniform heat distribution. Next, confirm you’re using the correct amount of batter; overfilling or underfilling can lead to inconsistencies.

Furthermore, avoid opening the lid prematurely during the cooking process, as this releases heat and disrupts the cooking cycle. Ensure the unit is properly preheated before adding batter. If issues persist, try rotating the waffle maker midway through cooking. Refer to your manual for specific temperature settings.

Recipes

Explore a world of waffle possibilities! Basic recipes and exciting variations are available to enhance your Toastmaster experience, creating delicious breakfasts and treats.

Basic Belgian Waffle Recipe

To begin, gather your ingredients: 1 ½ cups all-purpose flour, 3 ½ teaspoons baking powder, 1 teaspoon salt, 1 tablespoon sugar, 2 large eggs, 1 ¾ cups milk, and 6 tablespoons melted butter.

In a large bowl, whisk together the dry ingredients. Then, in a separate bowl, combine the eggs, milk, and melted butter. Gradually add the wet ingredients to the dry ingredients, mixing until just combined – avoid overmixing!

Preheat your Toastmaster waffle baker. Lightly grease the grids if needed. Pour the appropriate amount of batter onto the hot griddle and cook until golden brown and crispy, following your model’s specific timing.

Variations and Add-Ins

Elevate your Toastmaster waffles with delightful additions! For chocolate lovers, stir in ½ cup of chocolate chips or a tablespoon of cocoa powder to the basic batter.

Fruit enthusiasts can add ½ cup of blueberries, sliced bananas, or diced strawberries. A sprinkle of cinnamon or nutmeg enhances the flavor profile beautifully. Consider adding a splash of vanilla extract for extra richness.

For a savory twist, incorporate shredded cheese and cooked bacon bits. Experiment with different extracts and spices to create your signature waffle masterpiece, perfectly suited to your Toastmaster baker!

Understanding the Manuals

Toastmaster manuals, available from 2012-2021 on ManualsLib, Fixya, and the Internet Archive, detail safe operation and care for your waffle baker.

Locating User Manuals (ManualsLib, Fixya, Internet Archive)

Finding your Toastmaster Belgian waffle baker’s user manual is straightforward! ManualsLib hosts several versions, including those for models TWB2PIZCAN and TWB2PIZT, offering comprehensive guides. Fixya provides access to the Toastmaster TWB2 Cool Touch manual in PDF format, detailing ownership and operational information.

Furthermore, the Internet Archive preserves older manuals, like those dated 2020-08-20 and 2021-05-30, offering a historical perspective on product instructions. These resources ensure you can always access guidance for your specific model, regardless of its age, facilitating proper use and maintenance.

Manual Versions and Dates (2012-05-15, 2020-09-14, 2020-08-20, 2021-05-30)

Toastmaster Belgian waffle baker manuals have been updated over time, reflecting design changes and safety improvements. A version dated 2012-05-15 exists for certain models, while more recent guides, like the one from 2020-09-14, offer current instructions.

Additional versions from 2020-08-20 and 2021-05-30 are also available online, providing a range of documentation. These dates indicate the manual’s creation or revision date, helping users find the most relevant information for their specific waffle baker model and ensuring accurate operation.

Warranty Information

Allstate offers 2-year protection plans for Toastmaster waffle makers, providing coverage beyond the standard manufacturer’s warranty for peace of mind.

2-Year Protection Plans (Allstate)

Allstate provides extended warranty options for your Toastmaster Belgian Waffle Baker, offering comprehensive coverage for up to two years beyond the initial manufacturer’s warranty. These plans are designed to protect against unexpected repair costs due to mechanical or electrical failures.

For a cost of $1.99, as seen on eBay listings, you can safeguard your investment and enjoy worry-free waffle making. Allstate’s plans typically cover parts and labor, ensuring a hassle-free experience should any issues arise with your appliance. Consider this added security for continued enjoyment!

how to memorize scripture pdf

In a world brimming with digital distractions, intentionally hiding God’s Word within our hearts remains profoundly impactful, offering spiritual resilience and guidance.

Psalm 119:11 beautifully illustrates this principle – actively seeking God’s word and concealing it within the heart fosters a life aligned with His will.

Experiences, like extended study in places such as Jerusalem University College, underscore the enduring relevance of scripture, even amidst modern challenges.

Why Memorize Scripture? Spiritual Benefits

Memorizing Scripture isn’t merely an academic exercise; it’s a transformative spiritual discipline with far-reaching benefits. It cultivates a deeper intimacy with God, moving beyond surface-level reading to internalizing His truth.

When facing life’s challenges, readily accessible Scripture provides immediate comfort, guidance, and strength, acting as a powerful defense against temptation and doubt. This internalized Word becomes a wellspring of wisdom, shaping our thoughts, actions, and perspectives.

The act of memorization itself fosters discipline and focus, qualities valuable in all areas of life. Furthermore, recalling and meditating on Scripture throughout the day keeps God’s presence constantly before us, nurturing a continuous conversation with the Divine.

Like the Psalmist’s commitment to hiding God’s Word in his heart, we too can experience the freedom and joy that comes from a life saturated with Scripture, even utilizing resources like scripture PDFs to aid in this journey.

The Challenge of Memorization in the Digital Age

In today’s hyper-connected world, the sheer volume of information readily available presents a unique challenge to the practice of Scripture memorization. We’ve become accustomed to outsourcing our memory to smartphones and search engines, diminishing our inherent capacity for retention.

The constant stream of notifications and digital stimuli creates a fragmented attention span, making focused memorization increasingly difficult. The temptation to quickly “look up” a verse rather than recall it from memory undermines the spiritual benefits of internalization.

However, even within this digital landscape, the value of memorized Scripture remains paramount. Utilizing digital tools, like scripture PDFs, can assist memorization, but shouldn’t replace the intentional effort of committing God’s Word to heart.

Overcoming this challenge requires deliberate effort, disciplined practice, and a renewed commitment to cultivating a mind focused on God’s truth, resisting the allure of instant access and embracing the transformative power of internalizing Scripture.

Preparing for Effective Memorization

Strategic preparation is vital; thoughtfully selecting a readable translation and manageable passages, alongside a consistent schedule, sets the stage for successful scripture memorization.

Choosing a Translation: Readability and Accuracy

Selecting the right Bible translation is foundational for effective scripture memorization, particularly when utilizing PDF resources. Consider your reading level and comprehension; a translation you easily understand will significantly aid retention.

While accuracy is paramount, prioritize a balance between literal precision and natural flow. Some translations, like the New American Standard Bible (NASB), prioritize word-for-word accuracy, which can be beneficial for in-depth study, but potentially challenging for memorization.

Conversely, translations like the New International Version (NIV) or New Living Translation (NLT) offer greater readability, employing more contemporary language. When working with scripture PDFs, a clear and easily navigable text is crucial.

Experiment with a few different versions to discover which resonates best with you and facilitates memorization. A PDF format allows you to easily compare translations side-by-side, aiding in this selection process. Ultimately, the best translation is the one you’ll consistently engage with and internalize.

Selecting Passages: Starting Small and Building

Begin your scripture memorization journey with manageable passages – don’t attempt to tackle entire chapters initially. Short verses, or even phrases, are ideal starting points, especially when utilizing scripture PDFs for focused study.

Focus on passages that resonate with you personally, or those addressing specific areas of spiritual growth. This intrinsic connection will enhance motivation and retention. Consider thematic groupings; memorizing verses related to faith, hope, or love can create a cohesive understanding.

As you gain confidence, gradually increase the length and complexity of the passages you choose. A PDF format allows you to easily bookmark and revisit previously memorized sections, building upon your foundation.

Remember, consistency is key. Regularly reviewing shorter passages is more effective than sporadically attempting longer ones. Start small, build momentum, and celebrate each milestone achieved in your memorization efforts.

Creating a Memorization Schedule: Consistency is Key

Establishing a consistent memorization schedule is paramount to success. Treat it as a non-negotiable appointment with God, dedicating specific times each day or week to focused study, utilizing your scripture PDF resources.

Short, frequent sessions are generally more effective than lengthy, infrequent ones. Aim for 15-30 minutes daily, rather than a two-hour block weekly. Integrate scripture review into existing routines – during your commute, before meals, or at bedtime.

A PDF allows for easy access and portability, enabling memorization on the go. Schedule regular review intervals – immediately after learning, then daily, weekly, and monthly – to reinforce retention.

Be realistic and flexible. Life happens, so build in buffer time. The key is to maintain momentum and avoid prolonged breaks. Consistency, even in small doses, yields significant results over time.

Proven Memorization Techniques

Employing diverse methods, like repetition, chunking, association, and mnemonics, dramatically enhances scripture retention when working with your chosen PDF format.

Repetition and Spaced Repetition Systems (SRS)

Repetition is foundational to memorization, but how you repeat matters immensely. Simple rote learning quickly fades; however, strategically timed repetition, particularly through Spaced Repetition Systems (SRS), yields lasting results when utilizing a scripture PDF.

SRS algorithms, found in apps or created manually, present verses at increasing intervals – just as you’re about to forget them. This combats the forgetting curve, solidifying the text in long-term memory. When using a PDF, highlight verses for focused review.

Create a schedule: review a verse immediately, then again in one day, three days, a week, and a month. Adapt the intervals based on your recall. Digital flashcards, easily created from PDF content, are ideal for SRS. Consistent, spaced repetition transforms scripture from fleeting words into an internalized, readily accessible resource.

The Chunking Method: Breaking Down Verses

Long scripture passages can feel overwhelming. The chunking method tackles this by dividing verses into smaller, manageable units – phrases or clauses – making memorization less daunting, especially when working with a scripture PDF.

Instead of attempting to memorize an entire verse at once, focus on the first phrase. Repeat it until mastered, then add the next chunk. Build incrementally, linking each new segment to the previously learned ones. Highlight these chunks directly within your PDF for visual reinforcement.

For example, in Psalm 119:11, break it into: “How can a young man cleanse his way?” then “By taking heed according to Your word.” This approach leverages short-term memory more effectively, creating a stronger foundation for long-term retention.

Association and Visualization: Linking Scripture to Images

Our brains excel at remembering images. Combine scripture memorization with vivid visualization to create powerful mental anchors, enhancing recall, particularly when utilizing a scripture PDF.

As you read a verse, form a mental picture representing its meaning. For example, visualizing a young man earnestly seeking a clean path could accompany Psalm 119:11. Annotate your PDF with simple sketches or keywords triggering these images.

Association links scripture to personal experiences or familiar objects. If “hidden in my heart” resonates, picture a treasured keepsake safely stored. This technique transforms abstract words into concrete, memorable concepts, solidifying the verse in your mind.

Using Mnemonics: Acronyms and Rhymes

Mnemonics – memory aids like acronyms and rhymes – can dramatically boost scripture memorization, even when working with a scripture PDF. They transform challenging verses into easily recalled patterns.

Create acronyms using the first letter of each word in a verse. For instance, a simple phrase representing the verse’s core message can serve as a potent recall trigger. Annotate your PDF with these acronyms alongside the verse.

Rhymes, though requiring more effort, are incredibly effective. Crafting a short, memorable rhyme encapsulating the verse’s essence creates a strong auditory link. Consider the power of Psalm 119:11 – a rhythmic phrase can aid retention.

Leveraging PDF Resources for Memorization

Scripture PDFs offer portable, accessible memorization tools; annotation features allow highlighting key verses and adding personal notes for deeper engagement and retention.

Finding and Utilizing Scripture PDF Files

Numerous online resources provide readily available Scripture PDF files, catering to various translations and study preferences. Websites like Bible Gateway, YouVersion, and specific denominational sites often offer downloadable PDFs of entire Bibles or individual books.

Searching for “[translation name] Bible PDF” will quickly yield results. Consider the file size and clarity when choosing a PDF for memorization; a clean, readable format is crucial.

Beyond complete Bibles, many ministries create specialized PDFs focused on topical verses or memory verse collections, streamlining the selection process. Utilizing these curated resources can be particularly helpful for beginners.

Ensure the source is reputable to guarantee accuracy and avoid corrupted files. Once downloaded, organize your PDFs into folders for easy access and efficient memorization sessions. Remember to regularly update your collection with new translations or passages as desired.

Annotating PDFs: Highlighting and Note-Taking

Leveraging PDF annotation tools significantly enhances scripture memorization. Most PDF readers (Adobe Acrobat, Preview on Mac, or free alternatives) allow highlighting key phrases, words, or themes within verses.

Use different colors to categorize annotations – for example, highlight promises in blue, commands in green, and character traits in yellow. This visual coding aids recall.

Adding notes directly to the PDF is equally valuable. Write brief explanations, cross-references to related verses, or personal reflections alongside the text.

Consider noting the context of the verse, its literary structure, or how it applies to your life. These annotations transform a static PDF into a dynamic study and memorization tool, fostering deeper engagement with the scripture.

Creating Custom Scripture Memory PDFs

Tailoring PDFs specifically for memorization maximizes effectiveness. Begin by isolating verses or small passages into individual pages, removing surrounding text for focused study.

Utilize word processing software or graphic design tools to create visually appealing layouts. Experiment with font sizes, spacing, and formatting to enhance readability and memorability.

Incorporate fill-in-the-blank exercises, where key words are omitted, prompting active recall. Alternatively, create question-and-answer formats based on the scripture.

Consider adding visual cues, like relevant images or symbols, to aid association. Converting these customized documents to PDF ensures portability and consistent formatting across devices, creating a personalized memorization resource.

Tools and Apps to Aid Memorization

Digital tools, alongside scripture PDFs, amplify memorization efforts. Bible memory apps and flashcard software offer convenient, interactive learning experiences for verses.

Bible Memory Apps: Features and Comparison

Numerous Bible memory apps cater to diverse learning styles, often integrating seamlessly with scripture PDF resources. Popular options like Memorize Me and Fighter Verse employ spaced repetition, a technique proven to enhance long-term retention.

These apps typically allow users to input verses directly or import them from PDF files, creating personalized study lists. Features often include audio pronunciations, customizable review schedules, and progress tracking.

Verses Daily offers a unique approach, delivering a verse each day with contextual insights. Scripture Typer focuses on typing verses repeatedly, reinforcing muscle memory. Comparing these apps reveals varying strengths; some prioritize gamification, while others emphasize theological depth.

When selecting an app, consider its compatibility with PDF import, the flexibility of review settings, and whether it aligns with your preferred learning method. Many offer free trials, enabling exploration before committing to a subscription.

Flashcard Software: Digital and Physical Options

Flashcards remain a remarkably effective scripture memorization tool, available in both traditional physical formats and versatile digital software. For those utilizing scripture PDFs, extracting key verses for flashcard creation is straightforward.

Digital options like Anki and Quizlet offer spaced repetition algorithms, optimizing review schedules for maximum retention. These platforms allow importing data, potentially streamlining the process from PDF content. Customization is key – tailoring flashcards to focus on specific words or phrases.

Physical flashcards provide a tactile learning experience, fostering deeper engagement. Creating them manually reinforces the verse during the writing process. Both methods benefit from concise verse presentation, focusing on key concepts.

Choosing between digital and physical depends on personal preference. Digital tools offer portability and automated scheduling, while physical cards provide a distraction-free environment. Combining both approaches can yield optimal results.

Maintaining and Reviewing Memorized Scripture

Consistent review, utilizing your scripture PDF resources, prevents forgetting and solidifies verses within your heart and mind, ensuring lasting impact.

Regular Review: Preventing Forgetting

The initial effort of memorization is only half the battle; consistent review is absolutely crucial for long-term retention. Think of your memorized scripture as a garden – it requires ongoing tending to flourish and prevent weeds (forgetfulness) from taking over.

Leverage your scripture PDF files to create a structured review schedule. Don’t just passively re-read; actively recall the verses before looking at the text. This strengthens the neural pathways associated with the memory.

Spaced repetition is incredibly effective. Review verses shortly after memorizing them, then again a day later, then a few days later, and so on, gradually increasing the intervals. Your PDF can be annotated with dates for these review cycles.

Short, frequent review sessions are more beneficial than long, infrequent ones. Even five minutes a day can make a significant difference. Utilize the portability of your scripture PDF on various devices for convenient review throughout your day.

Applying Scripture to Daily Life: Practical Application

Memorized scripture isn’t meant to remain locked within our minds; its power is unleashed when actively applied to the circumstances of daily life. The verses you’ve diligently studied and stored, perhaps within a readily accessible scripture PDF, become tools for navigating challenges and making godly decisions.

When facing a difficult situation, consciously search your memory for relevant scripture. Consider how the principles within those verses apply to your current context. Your annotated PDF can serve as a quick reference to reinforce understanding.

Don’t simply recite the verse; meditate on its meaning and allow it to shape your thoughts, attitudes, and actions. This transforms memorization from a purely intellectual exercise into a life-changing spiritual discipline.

Sharing relevant scripture with others, drawn from your memorized passages and reinforced by your PDF resources, is a powerful way to both encourage them and solidify your own understanding.

Sharing Memorized Scripture: Reinforcing Learning

Verbalizing memorized scripture isn’t just beneficial for the recipient; it profoundly reinforces your own learning. Teaching others solidifies your grasp of the passage, revealing gaps in understanding you might not have noticed otherwise. Think of your scripture PDF as a study aid to prepare for these moments.

Share verses during conversations, offering encouragement or wisdom. Recite scripture to family members during mealtimes or bedtime. Utilize your memorized passages in prayer, lifting up specific needs and aligning your requests with God’s Word.

Consider creating a small group focused on scripture memorization, utilizing shared PDF resources for study and accountability. The act of explaining a verse to others forces you to articulate its meaning clearly.

This reciprocal learning process deepens your connection to the text and strengthens your faith, transforming memorization into a vibrant, communal experience.

greystone microwave convection oven manual

Greystone Microwave Convection Oven Manual: A Comprehensive Guide

This manual is a vital resource for Greystone oven owners, detailing features, usage, troubleshooting, and maintenance. It covers models from 0.9 to 1.5 cu. ft.,
and includes safety guidelines.

Greystone convection microwaves represent a fusion of convenience and culinary capability, designed specifically for modern living spaces – particularly within recreational vehicles and compact kitchens. These appliances, offered in various capacities (0.9, 1.1, 1.3, and 1.5 cu. ft.), seamlessly integrate microwave and convection cooking technologies. This combination allows for versatile food preparation, from simple reheating to baking and roasting.

The Greystone brand, often associated with Furrion, prioritizes quality and innovation in RV appliances. Their convection microwaves aim to deliver a full-featured cooking experience in a smaller footprint. Understanding the unique benefits of convection cooking – such as faster, more even heating – is key to maximizing the potential of these ovens. This manual serves as your guide to unlocking those capabilities, ensuring safe and efficient operation, and providing solutions to common issues. Proper utilization extends the lifespan and performance of your Greystone appliance.

Understanding Your Model: Capacity & Features (0.9 cu.ft., 1.1 cu.ft., 1.3 cu.ft., 1.5 cu.ft.)

Greystone offers a range of convection microwave models to suit diverse needs, differing primarily in internal capacity. The 0.9 cu. ft. models (like the FMSN09-BL) are ideal for smaller spaces and individual use, while the 1.5 cu. ft. (FMCM15AA-BS) provides ample room for families or larger dishes. The 1.1 and 1.3 cu. ft. options strike a balance between size and functionality.

Regardless of capacity, common features include touchpad controls, multiple power levels (up to 10), express cook options (often eight pre-set programs), and defrosting capabilities. Convection cooking is a standard feature, enabling baking and roasting. Specific models, like the 1.1 cu. ft. convection microwave, boast these features for enhanced versatility. Refer to your specific model’s documentation (P10034AP-L3-FR02, P90D23AP-YX-FR03) for a detailed feature list and capacity specifications. Understanding these distinctions ensures optimal performance.

Safety Precautions & Important Information

Prioritize safety by grounding the appliance and following installation instructions. Avoid corrosive chemicals and use the oven only as described in this manual for safe operation.

Microwave Energy & Safety Guidelines

Understanding microwave energy is crucial for safe operation. This appliance generates microwave energy, which cooks food by causing water molecules to vibrate, producing heat. It’s essential to never operate the oven when empty, as this can damage the magnetron – the component that generates the microwaves.

Always ensure the door seals are clean and undamaged, preventing microwave leakage. Do not attempt to tamper with or defeat the safety interlocks. These interlocks automatically shut off the microwave when the door is opened during operation.

Be cautious when heating liquids, as they can become superheated and erupt violently. Use microwave-safe containers and stir liquids before and during heating. Avoid heating sealed containers, as pressure buildup could cause them to explode.

Keep the area around the oven clear of flammable materials. Regularly inspect the power cord for damage and do not use the oven if the cord is frayed or damaged. Proper use and adherence to these guidelines will ensure safe and efficient operation of your Greystone convection microwave.

Grounding Instructions – Ensuring Electrical Safety

Electrical safety is paramount when operating your Greystone convection microwave. This appliance must be grounded to minimize the risk of electric shock. Grounding provides a safe path for electrical current in the event of a malfunction;

Connect the microwave only to a properly grounded outlet that meets local electrical codes. Do not use extension cords or adapters, as they can compromise the grounding system. If a grounding outlet is not available, consult a qualified electrician for installation.

Never alter the power cord plug. If the plug does not fit the outlet, have a qualified electrician install a compatible outlet. Improper grounding can result in a dangerous electrical hazard.

Regularly inspect the power cord and plug for damage. Discontinue use immediately if any damage is detected. Following these grounding instructions diligently will help ensure a safe operating environment and protect against potential electrical risks associated with your Greystone microwave.

Proper Installation & Location Requirements

Correct installation is crucial for optimal performance and safety of your Greystone convection microwave. Adhere strictly to the provided installation instructions; deviation may void the warranty and create hazards.

Locate the microwave on a stable, level surface capable of supporting its weight, even when fully loaded. Ensure adequate ventilation around the appliance – do not block ventilation openings. Maintain sufficient clearance above and around the unit for proper airflow.

Avoid installing near water sources, flammable materials, or heat-generating appliances. The microwave should not be placed in a confined space or cabinet unless specifically designed for microwave use. Ensure easy access to the power outlet for convenient operation and emergency shut-off.

Professional installation is recommended if you are unsure about any aspect of the process. Improper installation can lead to malfunction, damage, or safety risks. Always prioritize a secure and well-ventilated location.

Intended Use & Prohibited Substances

This Greystone microwave is designed solely for heating, cooking, and drying food. Utilizing it for any other purpose, such as drying clothes or operating non-food items, is strictly prohibited and may result in damage or safety hazards.

Never use corrosive chemicals or flammable vapors within the microwave. This includes cleaning agents not specifically approved for microwave use, as well as substances like gasoline, paint thinner, or aerosol sprays. Such materials pose a significant fire and explosion risk.

Avoid heating sealed containers or eggs in their shells, as pressure buildup can cause them to explode. Do not operate the microwave empty, as this can damage the magnetron. Always use microwave-safe cookware and utensils.

Adhering to these guidelines ensures safe and efficient operation, prolonging the lifespan of your appliance and preventing potential accidents. Misuse voids the warranty and compromises safety.

Operating Your Greystone Convection Microwave

Explore the control panel’s functions, including microwave power levels, convection cooking, express cook options, and defrosting settings for optimal performance.

Control Panel Overview & Functions

The Greystone convection microwave’s control panel is designed for intuitive operation. It features touchpad controls, offering access to a variety of cooking modes and settings. Key functions include power level selection, allowing you to adjust the cooking intensity from 10% to 100%. Eight express cook options provide pre-programmed settings for common foods, simplifying meal preparation.

The panel also incorporates dedicated buttons for frequently used functions like popcorn, reheat, and defrost. A digital display clearly shows the cooking time, power level, and selected mode. Utilizing the control panel, users can easily navigate through convection baking and roasting options, setting precise temperatures and cooking durations. The defrost function offers options based on weight or time, ensuring thorough and even thawing. Familiarizing yourself with these controls unlocks the full potential of your Greystone microwave.

Using Microwave Functions – Power Levels & Cooking Modes

Greystone microwaves offer ten distinct power levels, ranging from 10% for delicate tasks like softening butter, to 100% for rapid boiling or reheating. Lower power levels are ideal for maintaining texture and preventing splattering. Cooking modes extend beyond basic microwaving, encompassing options for popcorn, potato, pizza, and beverage heating.

These pre-programmed modes automatically adjust power levels and cooking times for optimal results. For customized cooking, manual time and power input is readily available. Remember that convection cooking utilizes a different set of controls, focusing on temperature and duration rather than power percentages. Experimenting with these settings allows you to tailor the microwave’s performance to your specific culinary needs, ensuring perfectly cooked meals every time. Always refer to recipes for suggested power levels and cooking times.

Utilizing Convection Cooking – Recipes & Techniques

Convection cooking in your Greystone microwave utilizes a fan to circulate hot air, resulting in faster, more even cooking – similar to a traditional oven. This is perfect for baking, roasting, and browning. Recipes designed for conventional ovens often translate well, but may require slightly reduced cooking times; monitoring is key.

For best results, use convection-safe cookware, such as glass or ceramic. Avoid metal, which can block microwave energy. Experiment with recipes like convection-baked cookies, roasted vegetables, or even small casseroles. Remember to preheat the oven for optimal browning. The 1.1 cu. ft. and 1.5 cu. ft. models excel at convection tasks. Always consult recipe guidelines and adjust cooking times as needed to achieve desired results. Proper ventilation is crucial during convection cooking.

Express Cook Options & Pre-set Programs

Greystone convection microwaves offer convenient Express Cook options for quick and easy meal preparation. These pre-programmed settings automatically adjust cooking time and power levels for popular foods like popcorn, pizza, potatoes, and beverages. The 1.1 cu. ft. model boasts eight express cook options, streamlining your cooking process.

Utilizing these programs is simple: select the desired food category and press the ‘Start’ button. You can often adjust the cooking time to suit your preferences. Beyond Express Cook, pre-set programs cater to specific cooking needs, such as defrosting or reheating. Familiarize yourself with these programs to maximize efficiency. Remember to always check food doneness after using any pre-set function, as cooking times may vary based on food quantity and initial temperature.

Defrosting Options & Guidelines

Greystone convection microwaves provide versatile defrosting options to safely and efficiently thaw frozen foods. These options typically include defrost settings based on weight or time. Weight defrost automatically calculates the defrosting time based on the food’s weight, ensuring even thawing. Time defrost allows you to manually set the defrosting duration.

For optimal results, remove food from any packaging before defrosting. Place smaller items together, and larger items separately. Rotate or flip the food halfway through the defrosting cycle to promote even thawing. Always check the food’s temperature after defrosting and cook immediately. The 1.1 cu; ft. model specifically includes convenient defrosting options alongside its other features. Be mindful that some foods defrost faster than others; adjust settings accordingly to prevent cooking.

Maintenance & Cleaning

Regular cleaning ensures optimal performance and longevity. This section details routine procedures for both the interior and exterior surfaces of your Greystone convection microwave.

Routine Cleaning Procedures

Maintaining a clean microwave is essential for both hygiene and optimal performance. After each use, wipe down the interior with a damp cloth to remove food splatters and spills. This prevents buildup that can cause odors and affect cooking efficiency. For light messes, a simple solution of water and dish soap works effectively.

The exterior surfaces should also be cleaned regularly. Use a soft cloth and mild detergent to wipe down the control panel, door, and cabinet. Avoid abrasive cleaners, as they can damage the finish. Pay particular attention to the door seal, ensuring it’s free of debris to maintain a proper seal during operation.

For stubborn stains or baked-on food, a steam cleaning method can be employed. Place a microwave-safe bowl filled with water and a tablespoon of vinegar inside the microwave and heat on high for several minutes. The steam will loosen the residue, making it easier to wipe away. Always unplug the microwave before performing any cleaning procedures.

Detailed Cleaning Instructions for Interior & Exterior

For a thorough interior cleaning, begin by removing the turntable and support ring; wash them in warm, soapy water and rinse thoroughly. Inside the microwave, combine 1 cup of water with 2 tablespoons of vinegar in a microwave-safe bowl. Heat on high for 5 minutes, then let stand for another 5 minutes without opening the door. This steam loosens grime.

Carefully remove the bowl (it will be hot!) and wipe down the interior with a damp cloth. For stubborn spots, create a paste of baking soda and water, apply, and gently scrub. Rinse with a clean, damp cloth.

Exterior cleaning: Unplug the appliance. Use a soft cloth dampened with mild dish soap to wipe the exterior surfaces. Avoid harsh chemicals. For stainless steel models, use a stainless steel cleaner and polish. Pay attention to the control panel and door seal, ensuring they are free of residue. Dry all surfaces with a clean cloth.

Troubleshooting Common Issues – Error Codes & Solutions

Encountering issues? This section addresses frequent problems. If the microwave displays an error code, consult the manual for specific definitions – these codes pinpoint the issue. Common problems include uneven heating; ensure food is arranged properly and the turntable is functioning. If there’s no power, check the outlet and circuit breaker. A humming sound without operation may indicate a faulty magnetron – contact service.

For sparking, immediately stop the microwave and inspect for metal objects or damaged waveguide cover. If the door doesn’t close properly, inspect the hinges and latch. If the control panel is unresponsive, try resetting the appliance by unplugging it for several minutes.

Remember to always prioritize safety; do not attempt repairs yourself if you are uncomfortable. Refer to the Lippert support site for detailed troubleshooting guides and potential service options.

Addressing Specific Problems: Uneven Heating, No Power, etc.

Uneven heating often stems from food placement; rotate dishes during cooking. Ensure the turntable operates freely and isn’t obstructed. If “No Power” occurs, verify the outlet’s functionality with another device and check the circuit breaker. A blown fuse is also a possibility. For a microwave that hums but doesn’t cook, a magnetron issue is likely – professional service is required.

If sparking happens, halt operation immediately and inspect the interior for metallic items or waveguide cover damage. A faulty door switch can also cause problems; ensure the door seals correctly. If the control panel is unresponsive, a reset (unplugging for a few minutes) might help.

Always consult the manual’s safety section before attempting any troubleshooting. For complex issues, contact Lippert support for assistance.

Troubleshooting & Service

This section provides model-specific troubleshooting guides (0.9, 1.1, 1.3 cu. ft.) and details accessing service manuals and Lippert support resources for your Greystone oven.

Greystone 0.9 cu.ft. Model Troubleshooting

Experiencing issues with your 0.9 cu.ft. Greystone microwave? Begin by verifying proper grounding and installation, as outlined in the safety sections. If the oven doesn’t power on, check the outlet and circuit breaker. For uneven heating, ensure food is arranged properly and utilize the turntable function.

Common error codes will be detailed in the full manual, available on the Lippert support site. If defrosting isn’t working effectively, confirm you’ve selected the appropriate defrost setting based on the food type and weight. Should sparking occur, immediately stop the oven and inspect for metal objects or damage inside.

For persistent problems, consult the comprehensive troubleshooting guide within the GREYSTONE P10034AP-L3-FR02 manual or contact Furrion support, as this model is a Greystone by Furrion product. Remember to have your model number readily available when seeking assistance.

Greystone 1.1 cu.ft. Convection Model Troubleshooting

If your 1.1 cu.ft. Greystone convection microwave isn’t functioning correctly, start with basic checks: power connection, outlet functionality, and proper grounding – crucial for safety. Uneven cooking in convection mode often stems from overcrowding; ensure adequate space around food items for air circulation.

For error codes, refer to the detailed troubleshooting section within the manual, accessible via Lippert support. If the express cook options aren’t responding, verify the correct program is selected. When using the defrost function, always follow the recommended guidelines for optimal results.

Should issues persist, consult the full manual (GREYSTONE P90D23AP-YX-FR03) for specific solutions. This model, a Greystone by Furrion product (FMCM15AA-BS), may also benefit from Furrion’s support resources. Document any error messages before contacting support for faster assistance.

Greystone 1.3 cu.ft. Model Troubleshooting

Addressing issues with your 1.3 cu.ft. Greystone microwave begins with verifying the power supply and grounding – a critical safety precaution detailed in the manual. If the unit fails to power on, check the circuit breaker and ensure proper outlet connection. For uneven heating, particularly during convection cooking, avoid overcrowding and rotate food during the cycle.

Explore the manual’s troubleshooting section (available through Lippert support) for specific error code definitions and recommended solutions. If pre-set programs aren’t functioning as expected, reset the appliance by disconnecting it from power for several minutes.

Remember that proper installation, as outlined in the manual, is essential for optimal performance. If problems continue, consult the comprehensive documentation or contact Lippert for assistance. This model benefits from the combined support resources of Greystone and Furrion.

Accessing Service Manuals & Support Resources (Lippert Support)

Lippert Support serves as the central hub for all Greystone microwave convection oven documentation, including detailed service manuals for models like the P10034AP-L3-FR02 and P90D23AP-YX-FR03. These manuals, available in PDF format, provide in-depth instructions for operation, maintenance, and troubleshooting.

Beyond manuals, Lippert’s website offers a wealth of resources, such as frequently asked questions (FAQs) and instructional videos, designed to assist owners with common issues. You can find support specifically for Furrion-integrated models like the FMCM15AA-BS and FMSN09-BL.

For personalized assistance, Lippert provides direct support channels, allowing you to connect with their team for specific questions or concerns. Utilizing these resources ensures you have the information needed to maximize the lifespan and performance of your Greystone appliance.

Technical Specifications & Documentation

Detailed specifications and documentation, including manuals for models P10034AP-L3-FR02 and P90D23AP-YX-FR03, are readily available. Furrion model details are also included.

GREYSTONE P10034AP-L3-FR02 Manual Details

The GREYSTONE P10034AP-L3-FR02 Microwave Oven Instructions, accessible in PDF format, provides a comprehensive guide to operating your appliance. This document meticulously outlines the procedures for effective and safe utilization of your oven, ensuring optimal performance and longevity. It doesn’t just cover basic operation; it delves into crucial aspects like cleaning guidelines and preventative maintenance tips, empowering you to keep your microwave in pristine condition.

Users will find detailed explanations of each function, allowing for a thorough understanding of the oven’s capabilities. The manual is designed to be user-friendly, with clear and concise language, making it accessible to individuals with varying levels of technical expertise. Downloading this manual is free and straightforward, providing immediate access to essential information. It’s a cornerstone resource for maximizing your Greystone microwave’s potential and addressing any operational questions you may encounter.

GREYSTONE P90D23AP-YX-FR03 Manual Details

Access the GREYSTONE P90D23AP-YX-FR03 Microwave Oven user manual instantly, benefiting from AI-powered Q&A functionality for quick problem-solving. This resource provides a detailed exploration of your microwave’s features, ensuring you can confidently utilize all its capabilities. The manual covers essential aspects, including proper installation procedures, detailed operational instructions, and crucial safety precautions, all designed to enhance your cooking experience.

Beyond the basics, the manual offers insights into troubleshooting common issues, helping you diagnose and resolve problems independently. Instant PDF access means you can have the information you need at your fingertips, whether you’re setting up the appliance, experimenting with new recipes, or addressing a technical concern. This manual is a vital companion for any Greystone P90D23AP-YX-FR03 owner, maximizing usability and ensuring years of reliable performance.

Furrion Model Integration (FMCM15AA-BS, FMSN09-BL)

Greystone collaborates with Furrion to offer integrated microwave solutions for recreational vehicles and beyond. The Furrion FMCM15AA-BS is a 1.5 cu. ft. over-the-range convection RV microwave, finished in black stainless steel, providing a stylish and functional addition to any RV kitchen. For a more compact option, the Furrion FMSN09-BL delivers 0.9 cu. ft. of microwave power in a sleek black design.

These Furrion models, often found under the Greystone brand, benefit from shared resources and support. Accessing manuals, videos, and FAQs related to both Greystone and Furrion products is streamlined through the Lippert support site. This integration ensures a consistent user experience and readily available assistance. Whether you own the FMCM15AA-BS or the FMSN09-BL, comprehensive documentation is available to optimize performance and address any operational questions.

Finding Additional Resources: FAQs & Videos

Beyond the comprehensive manual, Greystone offers a wealth of supplementary resources to enhance your ownership experience. The Lippert support website serves as a central hub for frequently asked questions (FAQs) addressing common concerns and operational queries regarding your convection microwave oven. These FAQs provide quick solutions to everyday issues, saving you time and effort.

Furthermore, Greystone provides a library of instructional videos demonstrating key features, cleaning procedures, and troubleshooting techniques. These visual guides complement the written manual, offering a more intuitive understanding of your appliance. Accessing these resources is simple – navigate to the Lippert support site and search for your specific Greystone model. This combination of FAQs and videos ensures you have the support needed to maximize the lifespan and performance of your Greystone convection microwave.

intex pure spa owner’s manual

Intex Pure Spa Owners Manual: A Comprehensive Guide (Updated 04/07/2026)

Welcome! This detailed manual‚ updated today (04/07/2026)‚ provides essential guidance for your Intex Pure Spa‚ ensuring optimal enjoyment and longevity.

Congratulations on selecting an Intex Pure Spa! This inflatable spa is designed to provide relaxation and therapeutic benefits in the comfort of your own home. This manual serves as a comprehensive resource‚ guiding you through every step – from initial setup and water chemistry to routine maintenance and troubleshooting.

Before you begin‚ please read this manual carefully to understand the features‚ safety precautions‚ and operational procedures specific to your Pure Spa model. Proper understanding will maximize your spa experience and ensure its long-term performance. We’ve included detailed instructions and helpful tips to address common questions and potential issues.

Your Pure Spa is built with quality and convenience in mind‚ offering a portable and easy-to-use hot tub solution. Let’s begin your journey to relaxation!

Unboxing and Component Checklist

Carefully unpack your Intex Pure Spa and verify all components are present. This checklist ensures you have everything needed for a successful setup. Locate and confirm the following items:

  • Spa Cover
  • Control Panel
  • Filter Cartridge (Type A or H‚ depending on model)
  • Insulated Ground Cloth
  • Repair Patch Kit
  • Spa Heater/Pump Unit
  • Connecting Hoses & Fittings
  • Owner’s Manual & Instructional DVD (if included)

Compare the contents of the box with this list. If any items are missing or appear damaged‚ do not proceed with installation. Contact Intex customer support immediately for assistance and replacement parts. Retain the original packaging for potential returns or warranty claims.

Identifying All Included Parts

Familiarize yourself with each component of your Intex Pure Spa. The spa itself is constructed from durable‚ puncture-resistant PVC. The heater/pump unit houses the filtration system and controls water temperature. The control panel allows for easy operation and adjustment of settings.

Hoses and fittings connect the heater/pump to the spa body. The ground cloth protects the spa base from damage. The filter cartridge maintains water cleanliness. The spa cover provides insulation and prevents debris from entering.

Carefully examine each part‚ noting its function and how it connects to other components. Refer to the detailed diagrams in this manual for visual identification. Understanding each part will simplify the setup and maintenance process.

Checking for Damage During Shipping

Upon receiving your Intex Pure Spa‚ thoroughly inspect all packaging for signs of damage during transit. Look for dents‚ tears‚ or punctures in the boxes. Carefully open each box and examine all included components.

Specifically check the spa itself for any rips‚ holes‚ or abrasions in the PVC material. Inspect the heater/pump unit for cracks or loose parts. Verify that all hoses‚ fittings‚ and the control panel are intact and undamaged.

If any damage is discovered‚ immediately document it with photographs and contact the retailer or Intex customer support. Do not attempt to assemble or operate a damaged spa.

Spa Setup and Installation

Before beginning‚ ensure you’ve carefully reviewed the component checklist and confirmed all parts are present. Select a suitable location – a flat‚ level surface capable of supporting the filled spa’s weight is crucial. Prepare the base surface with a protective layer‚ like a tarp or rubber mat‚ to prevent punctures.

Unfold the spa and position the heater/pump unit. Connect the hoses and fittings according to the diagram. Begin inflating the spa using the built-in pump‚ ensuring even inflation. Avoid over-inflating‚ as this can damage the material.

Once inflated‚ fill the spa with water‚ following the recommended fill level guidelines. Finally‚ connect the power supply and prepare for water chemistry balancing.

Choosing the Right Location

Selecting the ideal location is paramount for a relaxing and trouble-free Pure Spa experience. Prioritize a perfectly level surface; even a slight incline can cause uneven weight distribution and potential damage. Ensure the surface is capable of supporting the substantial weight of the spa when filled with water and occupants.

Consider proximity to a grounded electrical outlet – avoid extension cords. Protection from direct sunlight is also beneficial‚ minimizing UV degradation and reducing heating costs. A sheltered spot‚ shielded from wind‚ will help maintain water temperature.

Finally‚ think about privacy and accessibility for maintenance and enjoyment.

Preparing the Base Surface

Proper base preparation is crucial to prevent damage to your Intex Pure Spa. Begin by removing all rocks‚ sticks‚ and debris from the chosen location. A smooth‚ non-abrasive surface is essential; avoid placing the spa directly on concrete or asphalt without protection.

We recommend a layer of sand‚ or a dedicated spa pad‚ to cushion the base and distribute weight evenly. Ensure the surface is completely level using a spirit level – even minor imperfections can compromise the spa’s structure.

Thoroughly inspect the area for any sharp objects that could puncture the liner. A well-prepared base safeguards your investment and ensures years of relaxation.

Inflating the Spa

Before inflating‚ ensure the spa is positioned on the prepared base surface and all valves are securely closed. Connect the included inflation pump to the inflation valve and begin inflating the spa. Monitor the pressure carefully‚ avoiding over-inflation‚ which can damage the liner.

The spa will become firmer as it warms up and the air expands. Continue inflating until the spa reaches the desired firmness‚ but leave some give for comfortable use. Do not use an external air compressor‚ as it may cause damage.

Once inflated‚ double-check all valves for leaks and tighten as needed. Proper inflation is key to a safe and enjoyable spa experience.

Water Chemistry Basics

Maintaining proper water chemistry is crucial for a safe and enjoyable spa experience. Regular testing and balancing of pH‚ alkalinity‚ and sanitizer levels are essential to prevent skin irritation‚ cloudy water‚ and equipment damage.

pH levels should be maintained between 7.2 and 7.8. Alkalinity acts as a pH buffer and should be between 80-120 ppm. Sanitizers‚ like chlorine or bromine‚ kill bacteria and algae. Always follow the sanitizer manufacturer’s instructions for dosage.

Consistent water testing‚ ideally 2-3 times per week‚ will help you proactively adjust chemical levels and ensure optimal water quality.

Understanding pH Levels

pH measures the acidity or alkalinity of your spa water‚ on a scale of 0 to 14‚ with 7 being neutral. Maintaining the correct pH – ideally between 7.2 and 7.8 – is vital for bather comfort and equipment protection.

Low pH (below 7.2) is acidic and can cause corrosion of spa components‚ as well as skin and eye irritation. High pH (above 7.8) can lead to scaling‚ cloudy water‚ and reduced sanitizer effectiveness.

Regularly test your pH using a reliable test kit or strips. Adjust pH levels with pH increaser (to raise) or pH decreaser (to lower)‚ following product instructions carefully. Proper pH balance maximizes sanitizer efficiency.

Sanitizing with Chlorine or Bromine

Maintaining proper sanitation is crucial for a safe and enjoyable spa experience. Chlorine and Bromine are the most common sanitizers used in Intex Pure Spas. Chlorine is cost-effective but can have a stronger odor and may irritate sensitive skin. Bromine is gentler and more stable at higher temperatures.

Initial startup requires a shock treatment with a non-chlorine shock to activate the sanitizer. Regularly add sanitizer according to the manufacturer’s instructions and spa usage. Test sanitizer levels frequently using a test kit.

Always follow safety precautions when handling sanitizers. Never mix different chemicals together. Consistent sanitation prevents bacteria growth and keeps your water crystal clear.

Maintaining Water Balance

Achieving optimal water balance is vital for comfort‚ equipment protection‚ and sanitizer effectiveness. Key parameters include pH‚ alkalinity‚ and calcium hardness. Ideal pH levels should be between 7.2 and 7.8; low pH is corrosive‚ while high pH reduces sanitizer efficiency.

Total alkalinity acts as a pH buffer‚ preventing drastic fluctuations. Maintain alkalinity between 80-120 ppm. Calcium hardness prevents corrosion or scaling; aim for 150-250 ppm. Regularly test water chemistry using a reliable test kit.

Adjust levels with appropriate chemicals‚ following product instructions carefully. Balanced water extends the life of your spa and ensures a pleasant soaking experience.

Operating Your Pure Spa Control Panel

Your Intex Pure Spa’s control panel is the hub for managing all spa functions. The panel features intuitive buttons for power‚ temperature adjustment‚ and jet control. To power on‚ press the power button; the display will illuminate.

Temperature is adjusted using the up and down arrow buttons‚ displayed in Celsius or Fahrenheit. Jet control allows you to activate the bubble function for a massaging experience. Press the jet button to cycle through low‚ high‚ and off settings.

Familiarize yourself with the panel’s layout for effortless operation and a customized spa experience.

Powering On and Off

To initiate your Pure Spa experience‚ locate the power button on the control panel. A single press activates the spa’s heating and filtration systems‚ indicated by the illuminated display. Ensure the unit is properly connected to a grounded outlet before powering on.

When finished‚ press the power button again to enter standby mode. This will cease heating and jet operation‚ conserving energy. Note that the control panel may remain illuminated‚ displaying the last set temperature. For complete power disconnection‚ unplug the unit from the outlet when not in use for extended periods.

Temperature Adjustment

Your Intex Pure Spa features an intuitive temperature control system. Utilize the “Temp Up” and “Temp Down” buttons on the control panel to adjust the water temperature. Each press typically alters the setting by 1°F (or 0.5°C). The current water temperature is displayed prominently on the panel.

Allow sufficient time for the spa to reach the desired temperature – this can take several hours depending on initial water temperature and ambient conditions. The maximum temperature is usually capped at 104°F (40°C) for safety reasons. Remember to avoid drastic temperature changes‚ as they can impact water chemistry and comfort.

Jet Control Settings

The Intex Pure Spa’s jet system offers a relaxing hydrotherapy experience. Control jet operation via the dedicated “Jet” button on the control panel. A single press activates the jets at a standard speed. Subsequent presses may cycle through different speed settings – low‚ medium‚ and high – depending on your model.

Observe the control panel display to confirm the current jet setting. Prolonged jet use can slightly lower water temperature‚ so adjust accordingly. Remember to turn off the jets when not in use to conserve energy and minimize noise. Enjoy the customizable massage experience!

Filter Maintenance and Replacement

Maintaining a clean filter is crucial for optimal spa performance and water quality. Regular rinsing extends the filter’s life and ensures efficient filtration. Remove the filter cartridge and use a garden hose with a nozzle to spray away debris – work from the outside in. Avoid using harsh chemicals or high-pressure sprays‚ which can damage the filter media.

The filter cartridge should be fully replaced every 3-6 months‚ depending on spa usage. A clogged or damaged filter reduces water flow and strains the pump. Always turn off the power before removing or installing the filter. Proper filter maintenance guarantees a consistently clean and enjoyable spa experience.

Cleaning the Filter Cartridge

Regularly cleaning your Intex Pure Spa filter cartridge is vital for maintaining pristine water quality and extending its lifespan. Begin by powering down the spa and disconnecting the pump. Carefully remove the filter cartridge‚ noting its position for reinstallation. Utilize a garden hose with a spray nozzle to thoroughly rinse away dirt‚ debris‚ and oils.

Spray between the pleats‚ working from the top down‚ to dislodge embedded particles. Avoid using harsh chemicals or high-pressure settings‚ as these can damage the delicate filter fibers. For stubborn buildup‚ a filter cleaning solution can be employed‚ following the product instructions. Ensure the cartridge is completely dry before reinstalling.

Replacing the Filter Cartridge – Frequency & Procedure

Generally‚ your Intex Pure Spa filter cartridge should be replaced every 3-6 months‚ depending on usage and water quality. Reduced water flow or consistently cloudy water signals it’s time for a replacement. First‚ power off and disconnect the pump. Remove the old cartridge‚ noting its orientation.

Install the new cartridge‚ ensuring it’s correctly positioned within the filter housing. Securely tighten the filter housing cap. Prime the pump according to the spa’s instructions to remove air from the system. Dispose of the old cartridge responsibly. Regular replacement guarantees optimal filtration and a consistently clean spa experience.

Troubleshooting Common Issues

Encountering problems with your Intex Pure Spa? Start by checking the power supply and ensuring all connections are secure. Low heat often indicates a tripped breaker or a malfunctioning heater – consult a qualified technician. Cloudy water usually stems from imbalanced chemistry; test and adjust pH and sanitizer levels.

Error codes displayed on the control panel require specific attention; refer to the manual’s error code section for diagnosis. Jet malfunctions may indicate a clogged filter or pump issue. Remember to always prioritize safety and disconnect power before attempting any repairs. Consistent issues warrant professional assistance.

Error Codes and Their Meanings

Decoding your Intex Pure Spa’s error messages is crucial for swift troubleshooting. “E01” typically signals a low-flow error‚ often due to a clogged filter or insufficient water. “E02” indicates a heating system malfunction‚ potentially requiring heater replacement. “E03” suggests a temperature sensor issue‚ demanding professional attention.

“E04” often points to an overheating problem‚ necessitating immediate shutdown. “E05” signifies a pump error‚ possibly caused by debris or motor failure. Always consult the full error code list in your manual for precise definitions and recommended actions. Ignoring these codes can lead to further damage.

Low Heat/No Heat Issues

Experiencing insufficient heating or a completely cold spa? First‚ verify the power supply and ensure the unit is properly plugged in. Check the control panel settings – the temperature may be set too low‚ or the heating function disabled. A tripped circuit breaker is another common culprit; reset if necessary.

Low water levels can also prevent the heater from functioning correctly. Inspect the filter for clogs‚ as restricted flow impacts heating efficiency. If problems persist‚ the heating element itself may be faulty‚ requiring professional repair or replacement. Remember safety first – never attempt electrical repairs yourself.

Jet Malfunctions

If your Pure Spa jets aren’t functioning as expected‚ begin by checking the control panel settings to ensure they are activated. Verify the filter is clean‚ as a clogged filter significantly restricts water flow to the jets. Inspect the jet nozzles themselves for any blockages – debris can accumulate and impede performance.

Air bubbles in the system can sometimes cause erratic jet behavior; try briefly turning the spa off and on to release trapped air. For persistent issues‚ examine the pump for proper operation. A failing pump may not deliver sufficient pressure. Professional assistance might be needed for pump repairs or replacements.

Winterizing Your Intex Pure Spa

As temperatures drop‚ proper winterization protects your Pure Spa from freeze damage. Begin by completely draining the spa‚ including all plumbing lines – a wet/dry vacuum assists this process. Remove the filter cartridge and store it indoors‚ cleaned and dry. Disconnect all electrical connections before storing the control panel.

Thoroughly clean the spa’s interior with a spa cleaning solution to prevent algae growth during storage. Deflate the spa‚ ensuring it’s completely folded and stored in a dry‚ sheltered location‚ away from extreme cold; Consider using a spa cover for added protection. Regular checks throughout winter are recommended.

Draining and Cleaning Procedures

Regular draining and cleaning maintain water quality and extend your Pure Spa’s lifespan. To drain‚ attach a garden hose to the drain valve and direct the water to a suitable disposal area‚ adhering to local regulations. Ensure the spa is completely empty before proceeding.

Next‚ clean the interior surface with a mild soap and a soft cloth or sponge‚ avoiding abrasive cleaners. Rinse thoroughly to remove all soap residue. Inspect the filter housing and clean as needed. Before refilling‚ check for any leaks or damage. Proper cleaning prevents algae and bacteria buildup‚ ensuring a hygienic spa experience.

Protecting the Spa During Cold Weather

As temperatures drop‚ safeguarding your Intex Pure Spa is crucial to prevent damage. Completely drain the spa following the procedures outlined earlier‚ removing all water from the system. Disconnect all hoses and store them indoors. Clean and dry the interior thoroughly to avoid mildew.

Consider storing the spa indoors in a dry location‚ like a garage or shed. If indoor storage isn’t possible‚ cover the spa with a heavy-duty‚ waterproof cover. Ensure the cover is securely fastened to withstand wind and snow. Regularly check the cover for tears or damage throughout the winter months.