Brain Gym activities are simple, enjoyable movements designed to enhance learning by engaging both brain hemispheres. Available in PDF formats, these exercises promote focus, coordination, and stress reduction, offering a holistic approach to cognitive development for all ages.
What is Brain Gym?
Brain Gym is a series of simple, enjoyable movements designed to enhance learning and cognitive function by engaging both hemispheres of the brain. It is based on the principles of Educational Kinesiology, which focuses on improving coordination, focus, and overall brain integration. These exercises, such as cross-crawls and figure eights, help individuals develop bilateral movement skills, essential for learning and coordination. Brain Gym activities are widely used in classrooms and homes to support academic skills, reduce stress, and promote mental clarity. They are often provided in downloadable PDF guides, making them accessible for parents, teachers, and learners worldwide. By stimulating brain activity and fostering whole-brain learning, Brain Gym offers a holistic approach to improving cognitive abilities and overall well-being.
History and Development of Brain Gym
Brain Gym was developed in the 1980s by Paul and Gail Dennison, founders of Educational Kinesiology, a system focusing on movement to enhance learning. The Dennison’s work built on earlier research into brain function and movement, creating a structured program of 26 simple exercises. Initially designed for educators, Brain Gym gained popularity in the 1990s as a tool for improving focus, coordination, and academic performance. The exercises aim to integrate both hemispheres of the brain, promoting whole-brain learning. Over time, Brain Gym has evolved into a global movement, with resources like PDF guides making it accessible for teachers, parents, and learners. Its popularity stems from its holistic approach to cognitive development, emphasizing physical movement as a key to mental clarity and improved learning outcomes.
Importance of Brain Gym for Learning
Brain Gym activities are essential for fostering a conducive learning environment by enhancing focus, reducing stress, and improving coordination. These exercises, often available in PDF formats, are designed to integrate both hemispheres of the brain, promoting whole-brain learning. By stimulating bilateral movements and midline exercises, Brain Gym helps learners develop better concentration, memory, and problem-solving skills. It also supports emotional well-being by reducing anxiety and improving self-confidence. For students, this translates into improved academic performance and a stronger foundation for lifelong learning. The simplicity and accessibility of Brain Gym exercises make them a valuable tool for educators and parents seeking to enhance cognitive development and create a positive, engaging learning experience.

Benefits of Brain Gym Activities
Brain Gym activities improve focus, reduce stress, and enhance coordination. They boost learning skills, support brain development, and promote mental clarity and confidence through simple, enjoyable movements.
Improved Focus and Concentration
Brain Gym activities are specifically designed to enhance focus and concentration by engaging both hemispheres of the brain. Through exercises like cross-crawls and figure eights, these movements help improve coordination and mental clarity. For children and adults alike, these simple yet effective exercises can reduce distractions and increase attention span, making them invaluable for academic and professional tasks. The repetitive nature of Brain Gym movements helps train the brain to stay focused, leading to better performance in learning and daily activities. Available in PDF formats, these exercises provide a convenient way to incorporate focus-enhancing routines into daily life.
Enhanced Learning Skills
Brain Gym activities are specifically designed to enhance learning skills by improving the integration of both brain hemispheres. These simple, repetitive movements help individuals process information more efficiently, leading to better academic performance. Exercises like cross-crawls and figure eights are particularly effective in enhancing reading, writing, and math skills. By engaging the whole brain, these activities promote better retention and understanding of new concepts. Additionally, they help reduce learning challenges by creating a balanced and coordinated brain function. The availability of Brain Gym exercises in PDF formats makes it easy for parents and educators to incorporate these routines into daily learning schedules, ensuring a strong foundation for lifelong learning and cognitive development. Regular practice of these exercises can lead to noticeable improvements in overall academic abilities and confidence.
Stress Reduction and Relaxation
Brain Gym activities are highly effective for stress reduction and relaxation, promoting a calm and focused mind. Specific exercises, such as “hook-ups” and “brain buttons,” help release tension and balance brain function. These movements encourage deep breathing and mental clarity, reducing anxiety and stress. By engaging in these simple yet powerful activities, individuals can create a sense of harmony between their body and mind. The availability of Brain Gym exercises in PDF formats makes it easy to practice these stress-relieving techniques at home, in the classroom, or anywhere. Regular practice not only enhances learning abilities but also fosters emotional well-being, making it an ideal tool for managing daily stress and maintaining a relaxed state of being.
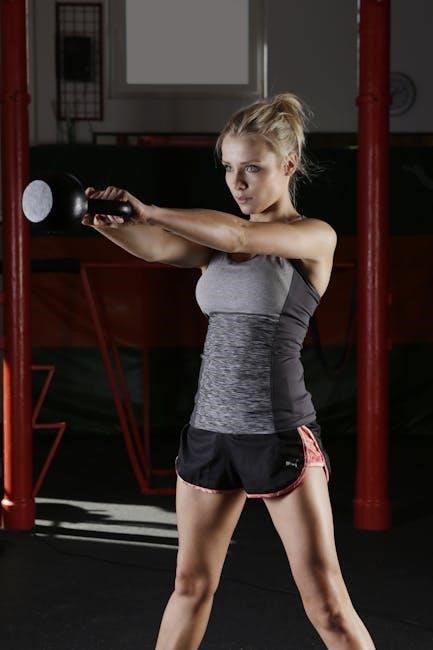
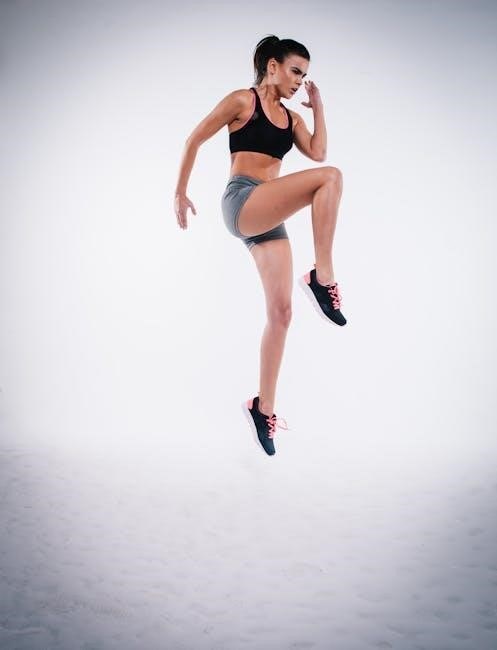
Better Coordination and Balance
Brain Gym activities are renowned for improving coordination and balance by enhancing the integration of bilateral movements. These exercises, such as cross crawls and figure eights, strengthen the connection between the left and right hemispheres of the brain. By practicing these movements, individuals can achieve better whole-body coordination, which is essential for physical activities like walking, running, and maintaining balance. The repetitive and rhythmic nature of Brain Gym exercises helps develop motor skills and spatial awareness, making them particularly beneficial for children and individuals with coordination challenges. Available in PDF formats, these exercises provide a convenient way to practice at home or in a classroom setting, promoting overall physical and cognitive harmony. Regular practice leads to improved posture, grace, and ease in daily movements, enhancing both physical and mental well-being.

Key Brain Gym Exercises
Brain Gym includes 26 simple movements like cross crawls, figure eights, and hook-ups, designed to enhance brain function and coordination. Available in PDF guides, these exercises promote learning and balance.
Top 10 Brain Gym Exercises for Children
Double Doodle: Enhances bilateral coordination and handwriting skills by drawing with both hands.
Lazy 8s: Improves focus and hand-eye coordination through figure-eight patterns.
Brain Buttons: Boosts energy and clarity by stimulating brain hemispheres.
Cross Crawl: Strengthens coordination and learning by crossing arms and legs.
Elephant Walk: Develops balance and memory through slow, deliberate movements.
Hook-Ups: Enhances teamwork and communication by connecting hands and feet.
Shake and Wake: Reduces stress and refreshes the brain with simple shaking movements.
Arm Circles: Improves posture and concentration through controlled arm movements.
Leg Swings: Boosts circulation and focus with dynamic leg exercises.
Walking the Line: Enhances balance and coordination by walking straight lines. These exercises are simple, fun, and effective for children, available in PDF guides for easy practice at home or in classrooms.
Focus on Bilateral Movements
Bilateral movements are a cornerstone of Brain Gym, engaging both sides of the body to enhance coordination and brain connectivity. These exercises, often included in Brain Gym PDF guides, involve synchronized actions like cross crawls, arm circles, and leg swings. By encouraging left-right integration, they improve motor skills, balance, and focus. For children, bilateral movements are particularly beneficial for developing handwriting and reading abilities. Adults can also gain from these exercises by improving overall physical harmony and cognitive function. The repetitive nature of these movements makes them easy to incorporate into daily routines, either at home or in educational settings. Regular practice fosters a stronger connection between the brain’s hemispheres, leading to enhanced learning and mental clarity for all ages.
Midline Movements for Brain Harmony
Midline movements in Brain Gym focus on exercises that cross the body’s midline, such as the “X” exercise or figure eights, to foster brain hemisphere integration. These activities, often detailed in Brain Gym PDF guides, enhance coordination, balance, and cognitive function. By practicing midline movements, individuals can improve visual tracking, reading skills, and overall brain harmony. These exercises are particularly effective for children, helping them develop better focus and academic performance. Adults also benefit, as midline movements promote mental clarity and reduce stress. Regular practice strengthens the connection between the left and right brain, leading to improved learning and physical coordination. These simple yet powerful movements are easy to incorporate into daily routines, making them a valuable tool for enhancing brain function at any age.
Specific Exercises for Academic Skills
Brain Gym offers targeted exercises to enhance specific academic skills, such as reading, writing, and math. For instance, the “Brain Buttons” exercise improves focus and mental clarity, while “Hook-Ups” reduce stress and enhance problem-solving. These movements, detailed in Brain Gym PDF guides, are designed to integrate brain hemispheres, fostering better coordination and academic performance. Specific exercises like “The X” and “Figure Eights” are particularly effective for visual tracking and spatial awareness, crucial for reading and math. By incorporating these activities, students can develop stronger cognitive foundations, leading to improved learning outcomes. These exercises are simple, engaging, and can be tailored to individual needs, making them a valuable resource for both children and adults seeking to enhance their academic abilities. Regular practice promotes confidence and skill mastery, ensuring long-term educational success.

How to Implement Brain Gym Activities
Brain Gym activities can be easily implemented using step-by-step guides from PDF resources, offering adaptable exercises for classrooms, homes, or individual practice to enhance learning and focus.
Step-by-Step Guide to Starting Brain Gym
Starting Brain Gym involves simple, structured movements designed to enhance brain function and coordination. Begin by understanding the basics of bilateral movements, which involve crossing the body’s midline to engage both hemispheres of the brain. Next, incorporate midline movements, such as the “cross crawl,” to improve harmony between brain hemispheres. Follow guided exercises like “hook-ups” and “brain buttons” to reduce stress and enhance focus. Use free PDF resources to access detailed step-by-step instructions and visual guides. These exercises can be adapted for various settings, including classrooms or home use, making Brain Gym accessible to all ages. Regular practice ensures consistent benefits in learning, concentration, and overall well-being.
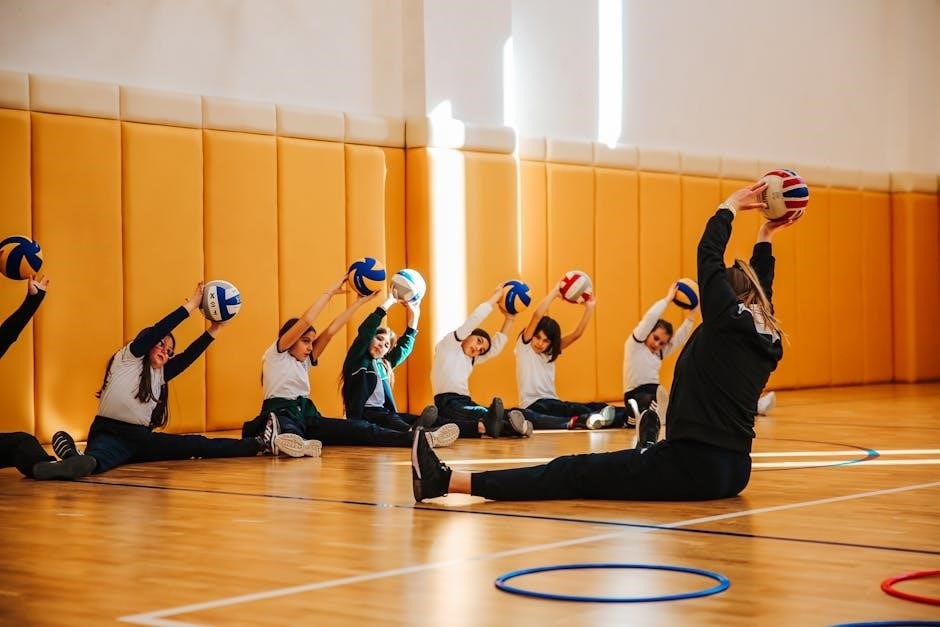
Brain Gym for Classroom Settings
Brain Gym activities are highly effective in classroom settings, helping students stay focused and engaged. Teachers can incorporate exercises like cross crawls, figure eights, and hook-ups to improve coordination and calmness. These movements are designed to enhance learning by integrating both hemispheres of the brain. Many educators use free Brain Gym PDF guides to plan and implement these activities seamlessly into their daily routines. By starting with simple movements, teachers can create a conducive learning environment that promotes academic success and reduces stress. Regular practice fosters better concentration and teamwork among students, making Brain Gym a valuable tool for classroom management and cognitive development.
Brain Gym at Home
Brain Gym activities can easily be practiced at home, offering a fun and effective way to support learning and development. Parents can download free Brain Gym PDF guides to access exercises tailored for children of all ages. These movements, such as bilateral exercises and midline activities, help improve focus, coordination, and overall brain function. By incorporating Brain Gym into daily routines, families can create a nurturing environment that encourages cognitive growth and relaxation. Many exercises are simple enough to be done during breaks or while doing homework, making them a convenient addition to home learning. With consistent practice, children can build stronger foundational skills, leading to improved academic performance and confidence;

Brain Gym Activities for Different Age Groups
Brain Gym activities cater to all ages, offering tailored exercises for preschoolers, school-aged children, and adults. These movements support cognitive growth, coordination, and overall well-being, ensuring benefits for every stage of life.
Brain Gym for Preschoolers (2-6 years)
Brain Gym activities for preschoolers aged 2-6 years are designed to foster early cognitive development through playful, simple movements. These exercises, such as cross crawls and figure eights, enhance coordination, focus, and creativity. By engaging both brain hemispheres, they help young children develop essential skills for reading, writing, and problem-solving. The activities are tailored to be fun and engaging, making learning an enjoyable experience. Parents and educators can access free PDF guides with age-specific exercises, ensuring preschoolers build a strong foundation for future academic success. These movements are easy to incorporate into daily routines, promoting physical and mental growth in a nurturing way.
Brain Gym for School-Aged Children
Brain Gym activities for school-aged children are specifically designed to support their academic success and overall development. These exercises, such as cross crawls and figure eights, help improve focus, coordination, and learning skills. By incorporating bilateral movements, children enhance their ability to process information and perform tasks requiring both hemispheres of the brain. Teachers and parents can use downloadable PDF guides to access age-appropriate exercises that address specific academic challenges, such as reading and math. Brain Gym also helps reduce stress and anxiety, creating a calmer, more focused mindset for learning. Regular practice fosters better coordination, balance, and confidence, making it an ideal addition to daily routines for school-aged children.
Brain Gym for Adults and Seniors
Brain Gym activities for adults and seniors offer a unique way to maintain cognitive function and physical coordination. These simple movements, such as hand exercises and cross-crawls, help improve focus, balance, and mental clarity. Seniors can benefit from enhanced coordination and reduced stress, while adults can use these exercises to boost productivity and reduce work-related tension. PDF guides provide easy-to-follow routines tailored for older individuals, promoting brain harmony and overall well-being. Regular practice supports long-term health and vitality, making Brain Gym an excellent addition to daily routines for adults and seniors alike.

Effectiveness of Brain Gym
Brain Gym activities effectively enhance learning and cognitive function through targeted movements. Research and testimonials highlight improved focus, coordination, and reduced stress, benefiting users of all ages.
Research on Brain Gym Benefits
Research highlights the positive impact of Brain Gym activities on cognitive function and learning. Studies, such as those by Aryati, demonstrate improved focus, coordination, and academic performance in children. These exercises, often detailed in PDF guides, enhance bilateral coordination and midline integration, which are critical for whole-brain learning. Additionally, Brain Gym has been shown to reduce stress and improve overall mental well-being, making it a valuable tool for students and adults alike. Many educators and researchers endorse these movements, citing their ability to create a balanced and harmonious brain function. The effectiveness of Brain Gym is further supported by testimonials from teachers and parents, who observe enhanced learning abilities and better emotional regulation in participants. Overall, the research underscores Brain Gym as a simple yet powerful approach to fostering cognitive and physical development.
Success Stories and Testimonials
Countless educators, parents, and individuals have shared inspiring stories about the impact of Brain Gym activities. Many report improved focus, coordination, and academic performance in children. For instance, Barbara Fox, a physical education teacher, successfully integrated Brain Gym into her classes, observing enhanced learning abilities and emotional regulation in students. Parents have also testified to the transformative effects of these exercises, noting better communication skills and confidence in their children. Testimonials highlight how Brain Gym activities, readily available in PDF guides, have helped individuals overcome learning challenges and achieve greater cognitive clarity. These success stories underscore the practical benefits of Brain Gym, making it a trusted and effective tool for fostering holistic development.
Comparison with Other Learning Techniques
Brain Gym stands out among learning techniques due to its unique focus on physical movements to enhance cognitive function. Unlike traditional methods, it emphasizes bilateral and midline exercises to integrate both brain hemispheres. Compared to purely sedentary learning strategies, Brain Gym incorporates body movement, making it more engaging and effective for kinesthetic learners. While other techniques may target specific skills, Brain Gym’s holistic approach improves overall brain function, coordination, and stress reduction. Its simplicity and accessibility through PDF guides make it a preferred choice for educators and parents seeking a low-cost, evidence-based method. This distinctive combination of movement and cognitive development sets Brain Gym apart from conventional learning techniques, offering a refreshing alternative for diverse learning needs.

Brain Gym Activities in PDF Format
Download free Brain Gym PDFs featuring exercises, guides, and worksheets to enhance learning and coordination. Perfect for home or classroom use, these printable resources are easy to access.
Free Brain Gym PDF Downloads
Access a variety of free Brain Gym PDF downloads designed to enhance learning and coordination. These printable resources include exercises, worksheets, and guides suitable for all ages. Perfect for home or classroom use, the PDFs offer simple yet effective movements like cross-crawls and figure eights to improve focus and balance. Many downloads are tailored for specific age groups, such as preschoolers or adults, ensuring activities are age-appropriate and engaging. These free resources provide a convenient way to incorporate Brain Gym into daily routines, promoting cognitive development and overall well-being. Download now and start benefiting from these easy-to-follow exercises that enhance mental clarity and physical coordination for everyone.
Printable Worksheets and Guides
Printable Brain Gym worksheets and guides offer a structured approach to enhancing learning and coordination. These resources are designed to be both educational and fun, providing a variety of exercises tailored to different age groups. From cross-crawls to figure eights, the activities are simple yet effective in improving focus, balance, and cognitive skills. Many guides include step-by-step instructions, making it easy for parents, teachers, or individuals to follow along. Whether used at home, in the classroom, or during extracurricular activities, these printable worksheets are a versatile tool for promoting mental and physical development. They are widely available online, often in PDF format, and can be downloaded for free or purchased through educational platforms. These resources are a great way to incorporate Brain Gym into daily routines for improved learning outcomes.
Interactive Brain Gym Exercises

Interactive Brain Gym exercises offer engaging ways to enhance learning and coordination through dynamic movements. These activities, often available in PDF guides, include hand exercises, cross-crawls, and figure eights, designed to stimulate brain activity. Videos and online demos provide visual guidance, making it easier to follow along. Many exercises focus on bilateral movements, which improve focus and balance. Interactive elements, such as printable worksheets with step-by-step instructions, allow users to track progress. These exercises are particularly effective for children, helping them develop cognitive and motor skills in a fun, hands-on way. By incorporating interactive Brain Gym exercises into daily routines, individuals can experience improved concentration, reduced stress, and enhanced overall brain function. These resources are widely available online, making it easy to start benefiting from Brain Gym today.
Brain Gym activities, available in PDF formats, offer a proven approach to enhancing learning, focus, and coordination through simple, engaging exercises for all ages, fostering cognitive growth and well-being.
Final Thoughts on Brain Gym Activities
Brain Gym activities, available in PDF formats, provide a scientifically grounded approach to enhancing learning and cognitive function through simple, enjoyable movements. These exercises, designed for all age groups, promote focus, coordination, and stress reduction, fostering a balanced integration of both brain hemispheres. By incorporating these activities into daily routines, individuals can experience improved academic performance, enhanced creativity, and better overall well-being. The accessibility of Brain Gym exercises in PDF formats makes it easy to implement them in classrooms, homes, or any setting, ensuring that everyone can benefit from this innovative method. With its proven success and ease of use, Brain Gym offers a powerful tool for unlocking full cognitive potential and nurturing lifelong learning. Encourage your child or yourself to try these exercises and witness the transformative impact on mental clarity and physical coordination. Download free Brain Gym PDFs today and start your journey toward enhanced learning and personal growth!

Encouragement to Try Brain Gym
Brain Gym activities are a simple yet powerful way to enhance learning and overall well-being. With exercises readily available in PDF formats, it’s easy to incorporate these movements into your daily routine. Whether you’re a parent, teacher, or individual seeking personal growth, Brain Gym offers a fun and effective way to improve focus, coordination, and mental clarity. The activities are designed for all ages, making them accessible to everyone. By trying Brain Gym, you can experience firsthand how these exercises can transform your approach to learning and life. Download a free Brain Gym PDF today and take the first step toward unlocking your full potential. Embrace this innovative method and enjoy the benefits of improved concentration, reduced stress, and enhanced creativity!